01 Getting Started
Welcome to the 123LiveStore User Guide!
The 123LiveStore WaaS (Website-as-a-Service) templates are expertly built with Wagtail, a robust open-source Content Management System (CMS) developed by Torchbox and backed by a dedicated global team of developers. Wagtail stands out as an exceptional choice for diverse websites, thanks to its remarkable scalability and extensive customizability.
This User Guide for 123LiveStore is a comprehensive resource that includes tutorials, how-to guides, reference materials, and explanations of key concepts to help you configure and manage your e-commerce store on the 123LiveStore platform. This guide caters to all users, including site owners, editors, administrators, and general users of 123LiveStore.
Domain Name
The first step is to register and purchase your own domain name for your website. We do not sell or resell domain names, but you can easily acquire one from either Namecheap.com or Cloudflare.com. We recommend using Cloudflare, as you will also need to utilise their CDN and Turnstile Captcha services. Keeping everything with Cloudflare may be more convenient for you.
If you purchased your domain from Cloudflare, you would have registered for an account, so you don't need to register again. If you bought your domain from Namecheap, you will need to register for a Free Cloudflare account.
In your Cloudflare account, ensure that your domain is pointing to the server's IP address that was emailed to you. The server's IP address info is also available in your account's Dashboard on 123LiveStore.com after you log in.
Sign Up on 123LiveStore
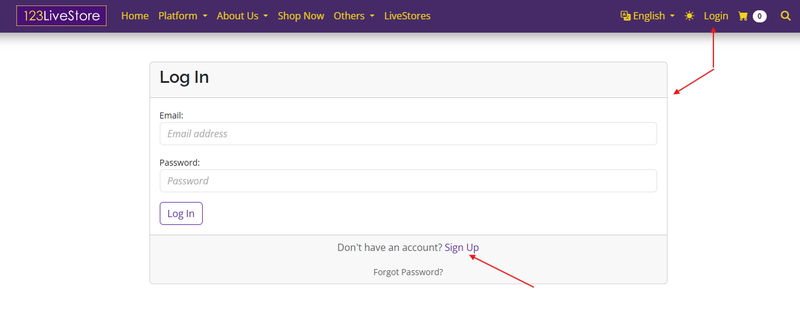
Start by signing up for an account on 123LiveStore: Sign Up
You can also access the page by clicking 'Login' at the top navigation menu to access the login page below, and then clicking the 'Sign Up' link.
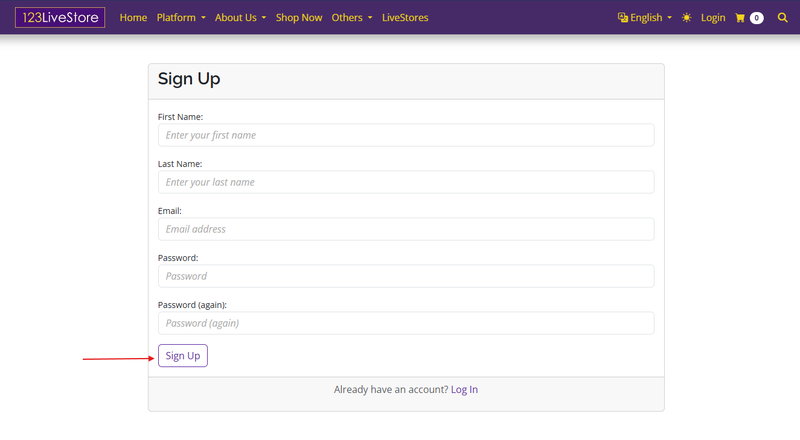
Complete the sign-up form below and click the 'Sign Up' button.
A verification email will be sent to the email address you provided. You should see something like this in your Inbox:
And the email should be something like this:
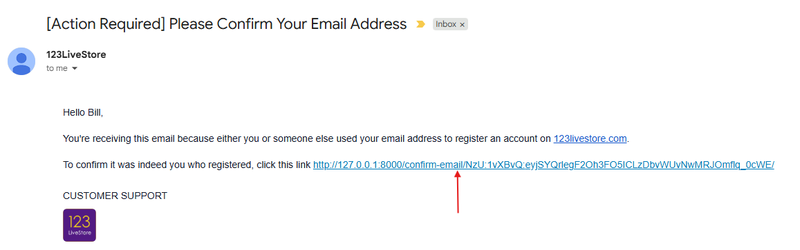
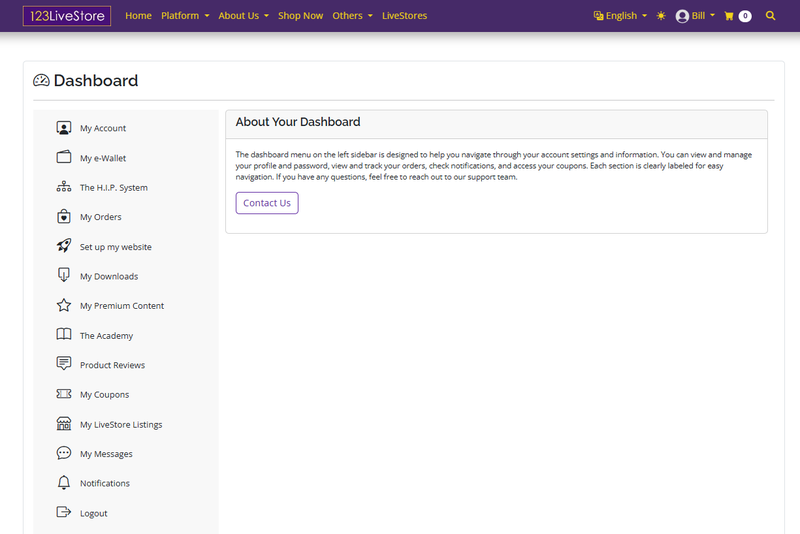
Please follow the instructions in the email and click the link to verify your email address. If your email is not verified, you will not be able to log in to 123LiveStore. If your email verified, you will automatically be logged-in to 123LiveStore and you will be taken to the 'Dashboard'.
Purchasing Your Preferred WaaS Template
Before you can start configuring your site, you must have a valid subscription to a WaaS template. Log in and go to Shop Now to purchase a WaaS template that suits your niche. If there isn't one for your niche, pick the Master Store WaaS, the generic template, as a starting point for your e-commerce store. Alternatively, you can use any of the templates, even if they are not specifically for your niche, because every aspect of the template can be edited to suit your needs.
We will be using the Master Store WaaS in this User Guide.
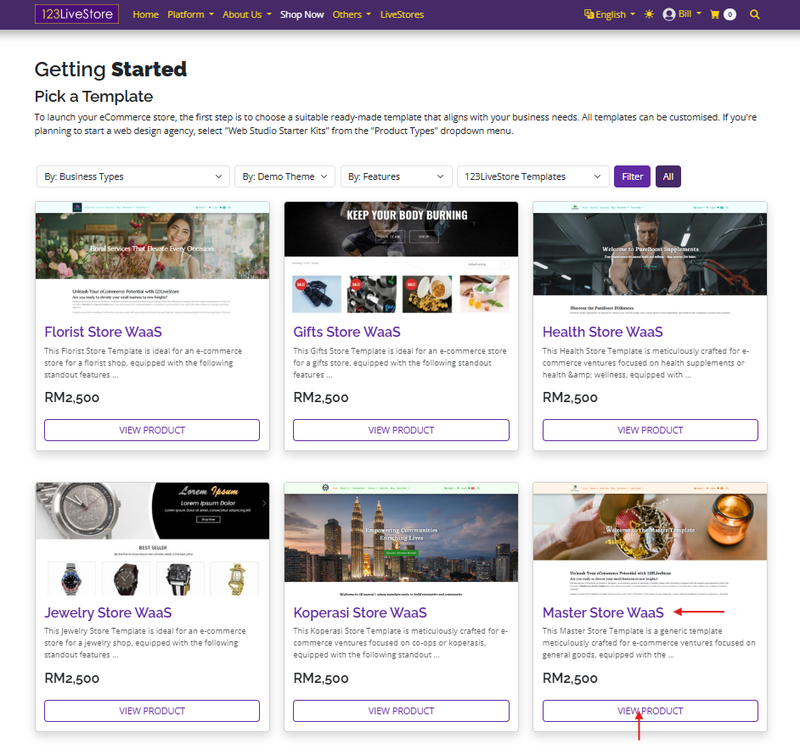
Click 'VIEW PRODUCT' to see the details page:
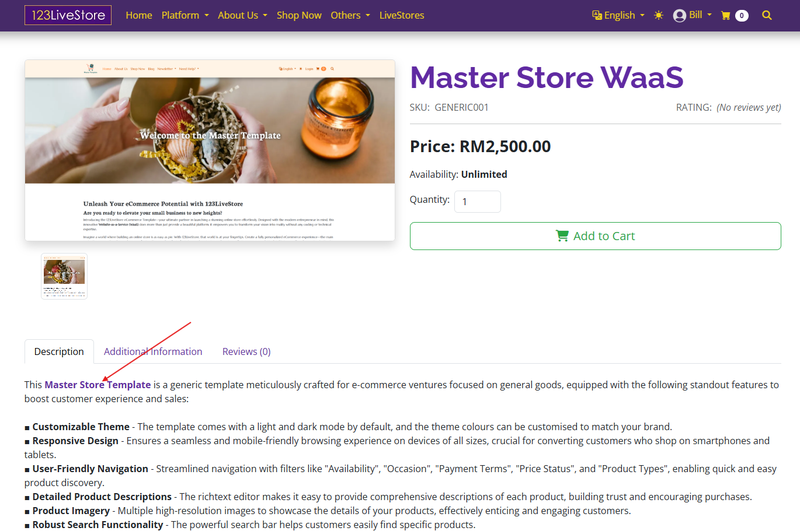
In the description, you will find a link to preview the template before adding it to your cart. Please note that nearly every aspect of the template is customizable; it is not fixed or rigid. However, a few elements, such as the layout of the product details page, cannot be changed. To purchase the template, click the 'Add to Cart' button to add it to your cart. Then, click the cart icon to view the contents of your shopping cart, as shown below:
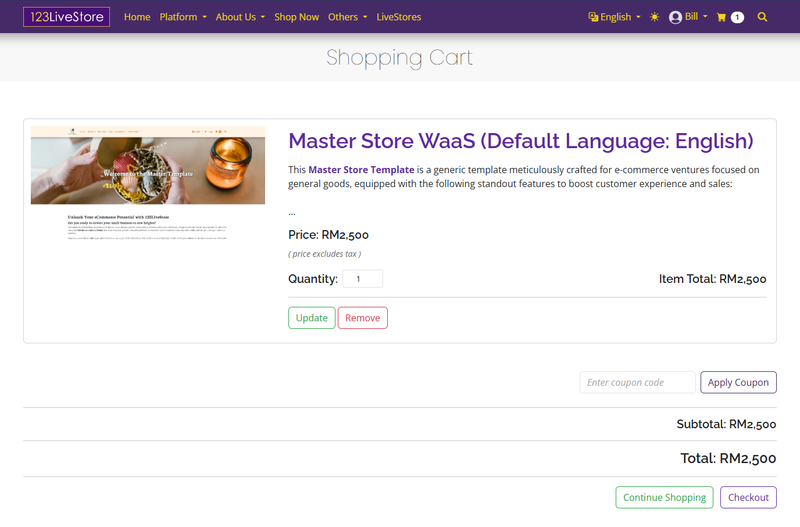
If you have a valid discount or prepaid coupon, please enter the coupon code and click the "Apply Coupon" button. Then, click the "Checkout" button, which will take you to the checkout page. Here, you will need to fill in your shipping information. This step is necessary even if no actual shipping is involved.
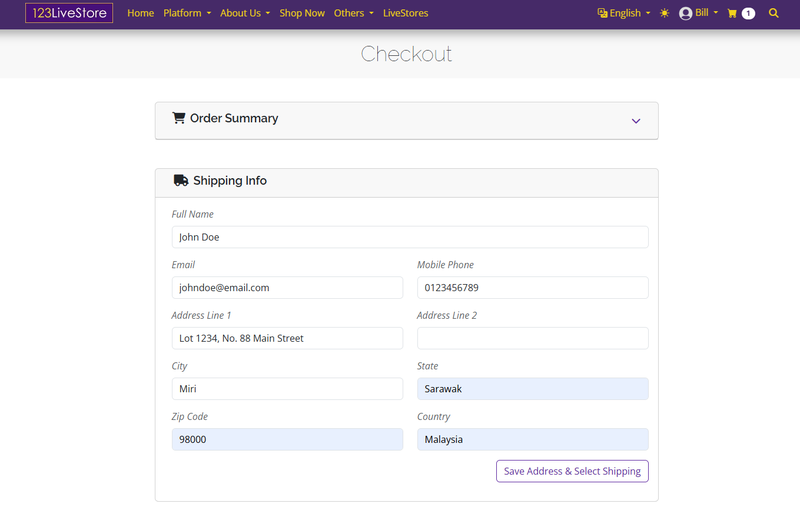
Next, click the 'Save Address & Select Shipping' button to proceed to the next stage, where you need to select a shipping method:
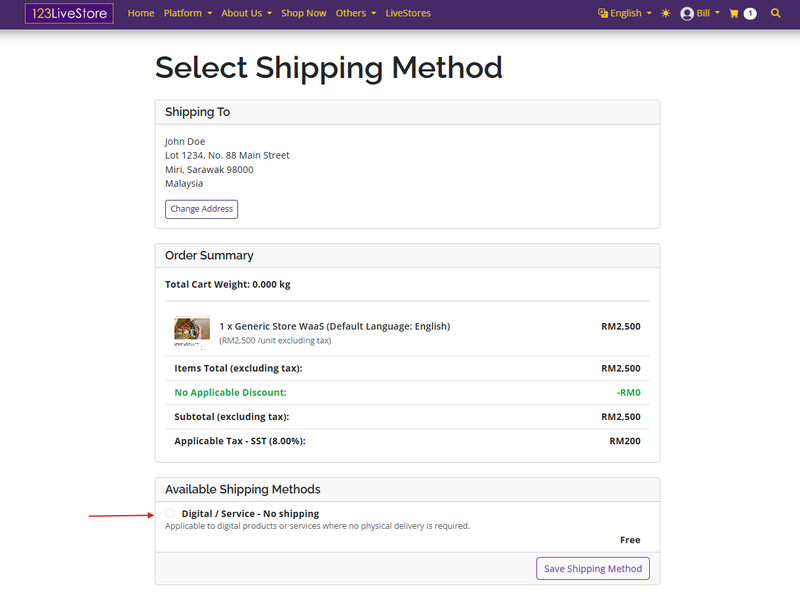
Since the template is a digital/intangible product or service, there is no shipping involved. Click the only option under 'Available Shipping Methods' - 'Digital / Service - No shipping', and click the 'Save Shipping Method' to proceed to the payment stage:
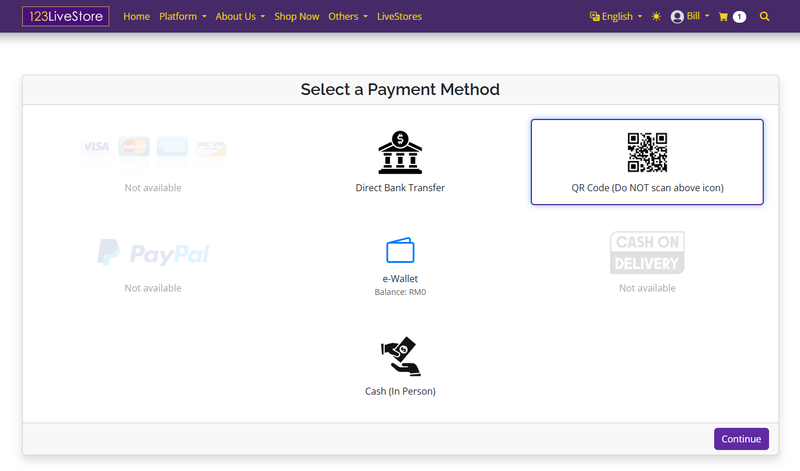
Click on an available payment method to make your payment. Let's choose payment via QR Code, which will bring up the QR Code page:
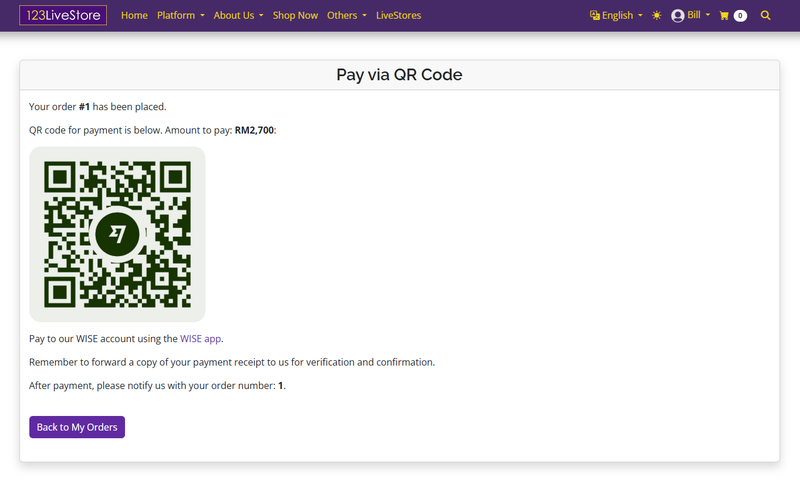
Use the appropriate app on your mobile phone to scan and make payment. Send us a copy of the transaction receipt so we can verify and acknowledge receipt to complete the sales transaction. You can track the status of your orders on the dashboard:
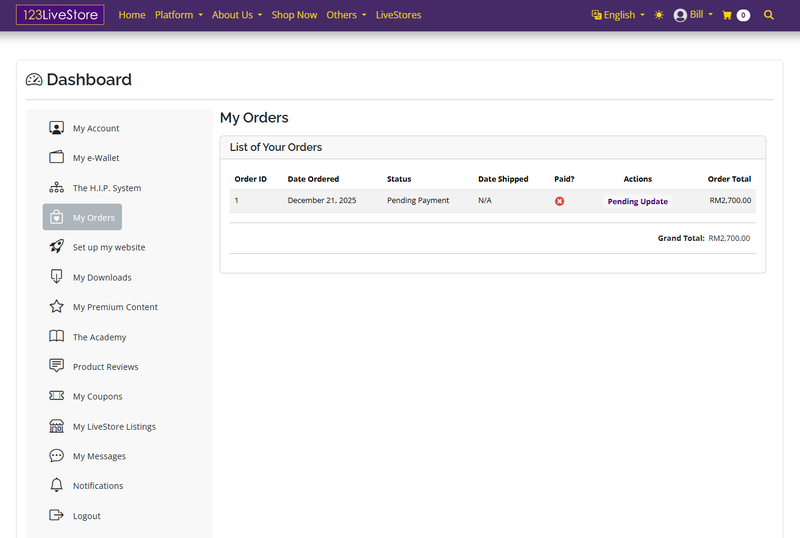
Once our accounts department has confirmation of your payment, your order will be marked as 'Paid' and the status will be updated accordingly.
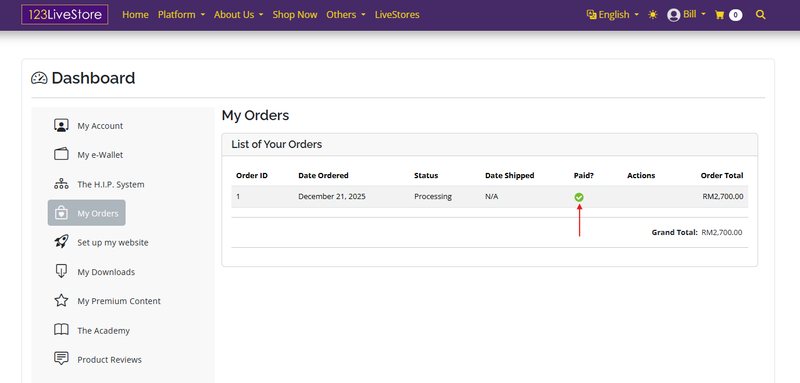
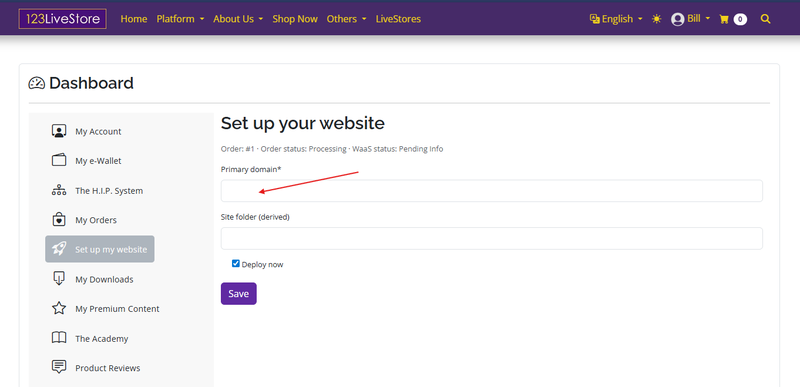
Now that your payment status is "Paid" you can proceed to the next stage, which is to "Set up my website". Click the link in the left navigation sidebar, enter the domain name of your website, and click 'Save'. If you want the site to deploy immediately, make sure to check the 'Deploy now' box. Deployment can take between 3 - 12 minutes. Upon completion, you will be able to access your website to customise it to your liking.