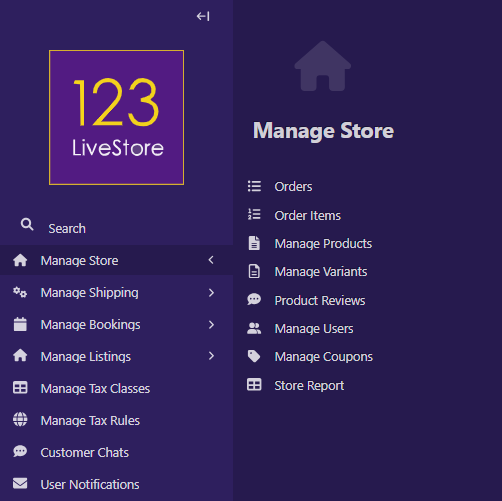
31 Manage Store
1. What This Feature Does
The store lets you sell physical goods, digital downloads, and subscription access — all from the same system.
Key capabilities:
- Physical (tangible) products with variants (color, size, etc.), inventory tracking, and shipping weights
- Digital (intangible) products — no shipping required
- Downloadable files — customers get a secure download link after purchasing
- Subscriptions — time-limited (monthly, yearly) or lifetime access products
- Customer reviews — verified purchase reviews with seller response
- Classified ad packages and directory tier packages (for sites using the Listings feature)
- Integrated cart → checkout → order flow with PayPal and Stripe payment
2. How It Works: The Big Picture
The store is built on the framework's page tree. Products are pages in your site's page hierarchy, not items in a simple list. This means:
- You create a Product Browse Page (List of Products - the index) first — this is the page visitors see when they browse your shop
- Then you create individual Product Pages as children of that browse page
- Each product has one or more Variants (SKUs) — these hold the actual price, stock level, and images
- Customers add variants to their cart, proceed through checkout, and pay online
Typical workflow:
Your Site Root
└── Shop (ProductIndexPage) ← browse/category page
├── Blue T-Shirt (ProductPage) ← individual product
│ ├── Variant: Small / Blue ← SKU, price, stock
│ └── Variant: Large / Blue
└── Python eBook (ProductPage)
└── Variant: PDF Download
3. Part 1: Enable the Store
The store is controlled by a per-site feature toggle.
Steps:
1. Go to Settings → WaaS Settings in the site admin
2. Find Enable Store and turn it on
3. Save
If Enable Store is off, product pages return a 404, and you cannot create new product pages.
4. Part 2: Create Your Shop Browse Page
Before adding any products, you need a browse page that lists them all.
Steps:
1. Go to Pages in the site admin
2. Navigate to where you want the shop (e.g., under your home page)
3. Click Add child page
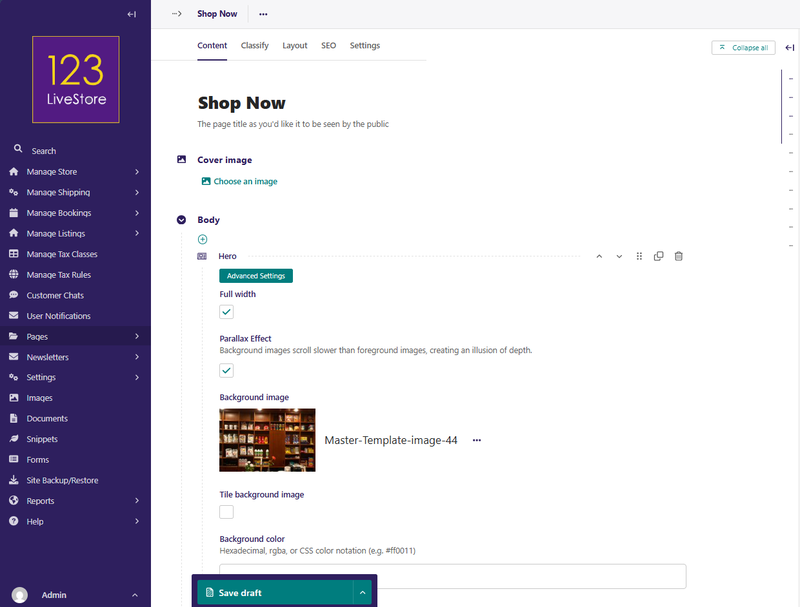
4. Choose List of Products
5. Fill in:
- Title: e.g., "Shop Now", "Store", "Products"
6. Optional: Add content to the Body field (welcome text, images, instructions)
7. SEO tab - Slug: e.g., `shop-now` or `store` (becomes part of the URL)
8. Click Save draft and/or Publish
The browse page only shows products where Product Available? is ticked AND the product is published. Unpublished or unavailable products are hidden automatically.
You can have multiple browse pages for different product categories, but each must live in a different part of the page tree.
5. Part 3: Set Up Product Attributes
Attributes define the dimensions along which your products vary — things like Color, Size, or Storage capacity. These become the selectors customers see on the product page (e.g., a "Color" dropdown or set of buttons).
Do this before creating products that have variants.
Steps:
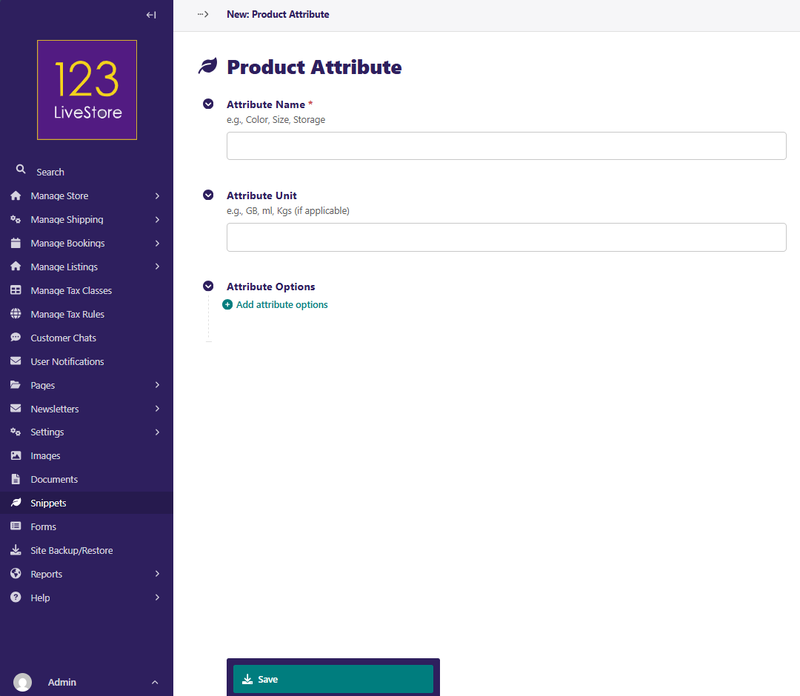
1. Go to Snippets → Product Attributes
2. Click Add Product Attribute
3. Fill in:
- Attribute Name: e.g., `Color`, `Size`, `Storage`
- Attribute Unit (optional): e.g., `GB`, `ml`, `kg`
4. Under Attribute Options, add the specific values for this attribute, e.g.:
- For Color: `Red`, `Blue`, `Black`, `White`
- For Size: `Small`, `Medium`, `Large`, `XL`
- For Storage: `64`, `128`, `256`, `512`
5. Save
Attribute names and option values can be translated for multilingual sites. See the Internationalisation section below.
Example setup for a clothing store:
| Attribute | Options |
|---|---|
| Color | Red, Blue, Black, White |
| Size | XS, S, M, L, XL, XXL |
6. Part 4: Set Up Taxes
If you need to charge tax on products, set up tax classes and rules first.
Step 1: Create a Tax Class
A tax class is a category of taxation, e.g., "Standard Rate" or "Zero-Rated".
1. Go to Manage Store → Tax Classes
2. Click Add Tax Class
3. Give it a name (e.g., "Standard VAT", "Reduced Rate", "Digital Services Tax")
4. Save
Step 2: Add Tax Rules
Each tax class needs at least one rule to define the actual rate.
1. Go to Manage Store → Tax Rules
2. Click Add Tax Rule
3. Fill in:
- Tax Class: select the class you created
- Country: leave blank for a global fallback, or choose a specific country
- Tax Rate (%): e.g., `20.00` for 20% VAT
- Is Active?: must be ticked for the rule to apply
4. Save
How tax rules work:
- When a customer checks out, the system looks at their country (from shipping address)
- It finds the tax rule for that country for your product's tax class
- If no country-specific rule exists, the global fallback (blank country) is used
- If a country-specific rule exists but is marked inactive, checkout is blocked for that country
Example setup for EU VAT:
| Tax Class | Country | Rate |
|---|---|---|
| Standard VAT | (blank — global) | 20% |
| Standard VAT | Germany | 19% |
| Standard VAT | France | 20% |
| Standard VAT | Luxembourg | 17% |
Step 3: Assign a Tax Class to Products
When creating or editing a product page, scroll to the Taxation section and select the appropriate tax class.
7. Part 5: Create Your First Product
Step 1: Create the Product Page
1. Go to Pages in the site admin
2. Navigate to your browse page (e.g., "Shop Now")
3. Click Add child page
4. Choose Parent page - eg. "Home | Shop Now" and click Continue
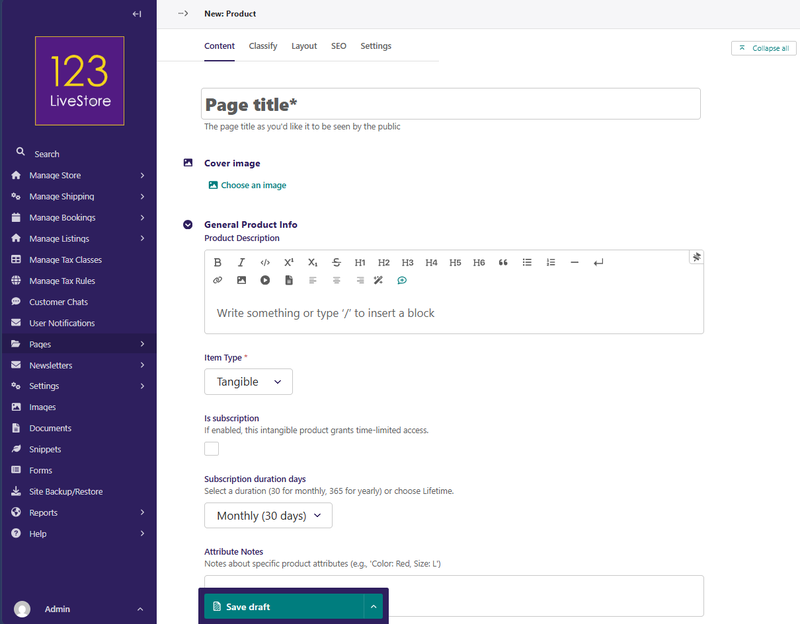
5. Fill in the General Product Info section:
- Title: product name as displayed on the site
- Product Description: rich text description
- Item Type: choose Tangible (physical goods) or Intangible (digital/services)
- Is subscription - If enabled, this intangible product grants time-limited access
- Subscription duration days: Select a duration (30 for monthly, 365 for yearly) or choose Lifetime.
- Attribute Notes (optional): free-text notes about variants, e.g. "Colors may appear slightly different on screen"
- Product Available?: controls whether this product is visible on the browse page — affects ALL variants at once. Untick to temporarily hide the whole product.
6. For tangible products, fill in Shipping Dimensions & Weight:
- Physical Weight (kg)
- Package Width / Length / Height (cm)
- These are used for shipping rate calculations
7. Under Taxation, select the appropriate Tax Class (if applicable)
8. Click the SEO tab to set the slug and SEO details
Step 2: Add Product Variants
Every product needs at least one variant. Variants hold the SKU, price, and stock.
Scroll to the Variants / SKUs section and click Add Variant.
For each variant:
| Field | Description |
|---|---|
| SKU | Stock-keeping unit code. Must be unique across all products. Leave blank to auto-generate. |
| Price | Regular selling price |
| Stock Quantity | How many units are in stock (for tangible products) |
| On Sale? | Tick to activate a sale price |
| Sale Price | Sale price (only used when On Sale is ticked) |
| Is Available? | Untick to hide just this variant (product-level "Available?" hides everything) |
| Featured Variant | The variant shown first on the product page and on index cards |
| Track Inventory | If ticked, stock quantity is decremented on purchase |
| Price Includes Tax | Tick if the price shown is already tax-inclusive |
| Variant Options | Select which attribute options apply to this variant (e.g., Color=Blue, Size=Large) |
| Access Groups | User groups that purchasing this variant grants membership to (advanced) |
Gallery Images: Click Add Image within the variant to add photos. Mark one as Featured Image — this is the image shown on cards and as the default on the product page.
Downloadable Files: If this is a digital product with a file to download, click Add Downloadable File within the variant.
Step 3: Publish
Click Publish (or Save Draft if not ready to go live). The product will now appear on your browse page.
8. Part 6: Product Types & Special Configurations
Tangible Products
Physical goods that require shipping.
- Set Item Type to Tangible
- Enter weight and package dimensions — these are used by the shipping calculator
- Variants should have Track Inventory ticked and a Stock Quantity set
- When stock reaches 0, the variant is treated as out of stock (still visible, but cannot be added to cart unless `is_available` is still ticked)
Intangible Products
Digital goods or services — no shipping required.
- Set Item Type to Intangible
- Leave weight/dimensions blank
- Stock quantity is typically left at 0 (or ignored)
- Good for: eBooks, online courses, software licences, service packages
Downloadable Products
Intangible products where the customer receives a file after purchase.
- Set Item Type to Intangible
- Within the variant, use Add Downloadable File to upload the file
- After purchase, customers get a secure download link in their order confirmation and order history
- The download link is protected: only customers who paid for that order item can access it
Subscription Products
Intangible products that grant time-limited access.
- Set Item Type to Intangible
- Tick Is Subscription
- Choose Subscription Duration Days:
- 30 = Monthly subscription
- 365 = Yearly subscription
- Lifetime = no expiry (leave blank or use the Lifetime option)
- When a customer purchases a subscription, a `UserSubscription` record is created, tracking their start and end dates
- Access is checked at request time — no background jobs or manual group management needed
See [ 12. Part 10: Subscription Products & Access Control ] for how to gate pages behind subscriptions.
9. Part 7: Manage Inventory & Stock
Per-Variant Inventory
Each variant has its own stock settings:
- Track Inventory: when enabled, `stock_quantity` decrements when an order is completed
- Stock Quantity: current units available
- Is Available?: manually override availability, regardless of stock count
What customers see
- For tangible variants: if `track_inventory` is on and `stock_quantity` is 0, the variant is treated as out of stock and cannot be added to the cart. The variant remains visible so customers can see the product.
- For intangible variants: stock quantity is not enforced. Availability is controlled only by the `Is Available?` flag.
- If `Is Available?` is unticked on a variant, that specific variant is hidden from the product page.
- If `Product Available?` is unticked on the product page itself, all variants are hidden, and the product is removed from the browse page.
Restocking
To restock a sold-out variant:
1. Open the product page in site admin
2. Find the variant
3. Update Stock Quantity
4. Make sure Is Available? is ticked
5. Save and publish
10. Part 8: Sales & Pricing
Running a Sale on a Variant
1. Open the product page in the site admin
2. Find the variant you want to put on sale
3. Tick On Sale?
4. Enter the Sale Price (must be greater than 0)
5. Save and publish
The sale price will appear on the product page and on index cards. The original price will show as struck-through.
Featured Variant
Only one variant per product can be marked as Featured Variant. This variant:
- Is shown first on the product detail page
- Provides the price shown on the browse/index page card
- Is selected by default when a customer lands on the product
If no variant is marked as featured, the cheapest available variant is used for card display.
Price Includes Tax
If your pricing is tax-inclusive (common in some countries), tick Price Includes Tax on each variant. The system will back-calculate the tax component at checkout rather than adding it on top.
11. Part 9: Product Reviews
Customers who have purchased a product can leave a review. Reviews include a 1–5 star rating, a title, and a comment.
Review moderation
Reviews are not visible by default. They have `Approved = No` until you approve them.
To approve a review:
1. Go to Manage Store → Product Reviews
2. Find the review in the list
3. Edit it and tick Approved
4. Save
Responding to reviews
You can post a Seller Response to any review:
1. Open the review in Manage Store → Product Reviews
2. Enter your response in the Seller Response field
3. Save
Once you post a seller response, the customer can no longer edit their review.
Cross-locale reviews
If your site has multiple language versions, reviews are shared across locales by SKU. A customer who bought the English version of a product and left a review will have that review appear on the French version too — as long as the SKU matches.
12. Part 10: Subscription Products & Access Control
How subscriptions work
1. A customer purchases a subscription product (intangible + `is_subscription=True`)
2. After payment is confirmed, a `UserSubscription` record is created with `start_date` and `end_date`
3. When the customer visits a gated page, the system checks whether they have an active, non-expired subscription
4. Unauthenticated users → redirected to login
5. Authenticated users without an active subscription → redirected to the upgrade page at `/store/{product-slug}/subscription-required/`
6. Active subscribers → page loads normally
Lifetime subscriptions have no `end_date` and never expire.
Gating a page via the admin (no coding needed)
Use Subscription Access Rules to protect any content page behind a subscription product.
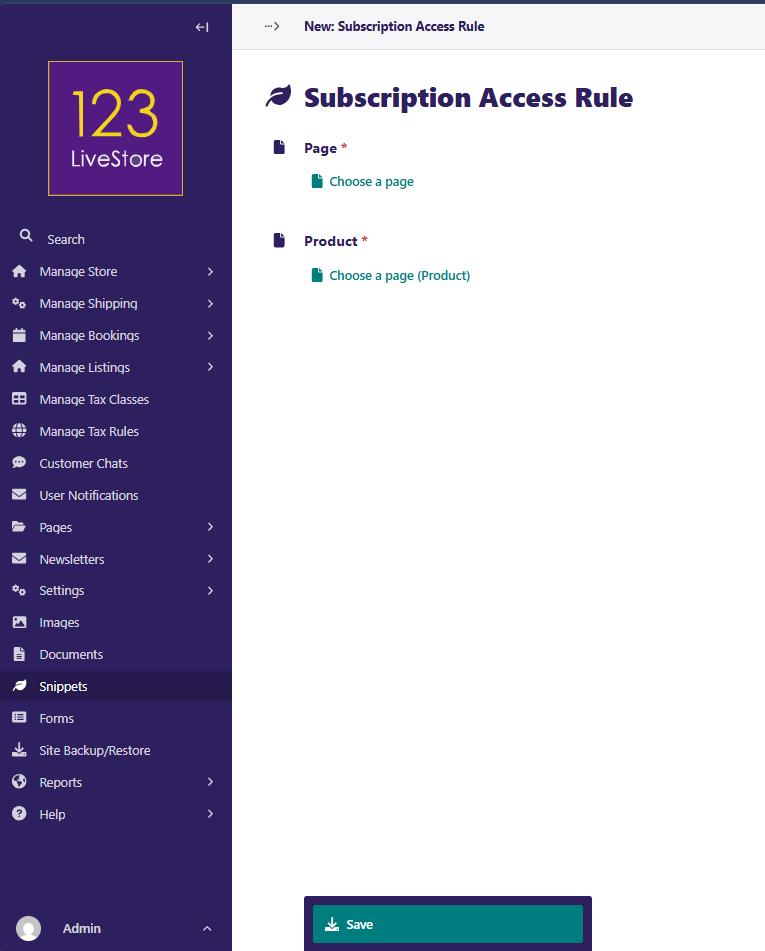
Steps:
1. Go to Snippets → Subscription Access Rules
2. Click Add Subscription Access Rule
3. Choose:
- Page: the page you want to protect (e.g., your premium members area)
- Product: the subscription product that grants access
4. Save
That's it. Visitors to that page will now be checked for an active subscription.
Notes:
- One rule per page. For multi-page sections, add a rule for each page.
- The product in the rule must have `Is Subscription` ticked.
- site editors previewing pages bypass subscription checks.
13. Part 11: Downloadable Files
Adding a downloadable file to a variant
1. Open the product page in the site admin
2. Scroll to the variant
3. Click Add Downloadable File
4. Upload the file and optionally enter a Display Name (shown to customers)
5. Save and publish the product
What customers experience
After a successful purchase:
- The order confirmation email includes a download link
- The customer's order history page shows a "Download" button
- Clicking it checks that the customer actually paid for that item, then serves the file
Security
Download links are protected. The system verifies that a `UserDownloadEntitlement` record exists for that customer and order item before serving the file. Direct URL access without a valid entitlement returns a 403 Forbidden error.
14. Part 12: Special-Purpose Products
These product types support specific platform features. Most stores will not need them.
Classified Ad Packages
For sites using the Listings feature that charge users to post classified ads.
- Tick Is Classified Ad Package
- Set Ad Package Duration (Days): how many days the ad listing stays active after purchase
When a customer buys this product, their classified ad listing gets an active period equal to this duration.
Directory Tier Packages
For sites using the Directory feature with paid listing tiers.
- Tick Is Directory Tier Package
- Choose Directory Tier: `Premium` or `VIP`
- Set Directory Tier Duration (Days): leave blank for lifetime/free tier
- For upgrade products (e.g., going from Premium to VIP at a discounted price):
- Tick Is Directory Tier Upgrade Product
- Set Upgrade From Tier: the tier the user must currently be on to buy this product
15. Orders
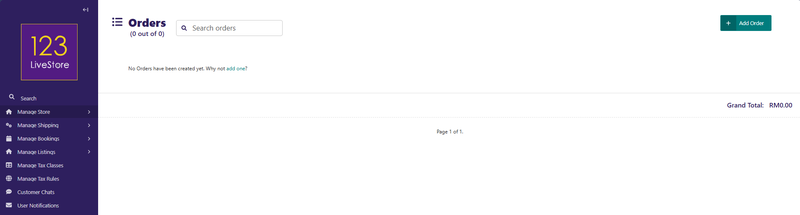
This menu option displays a list of ALL Orders with a Grand Total.
16. Order Items
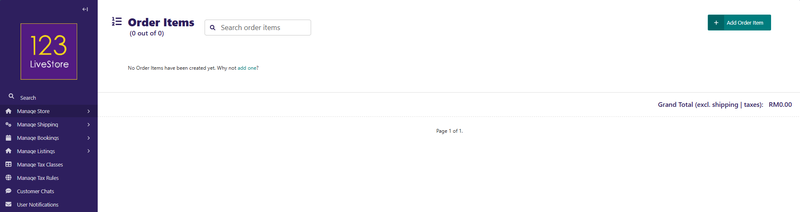
This menu option displays a list of ALL Order Items with a Grand Total that excludes Shipping & Applicable Taxes.
17. Manage Users
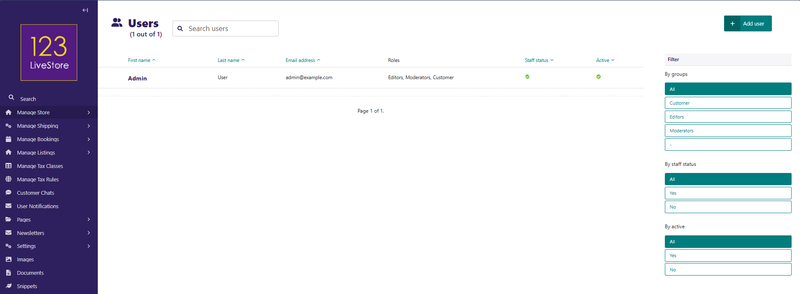
This menu option displays a list of ALL Registered Users. Admin Superuser can edit user records. Search & Filters are available to help find users quickly.
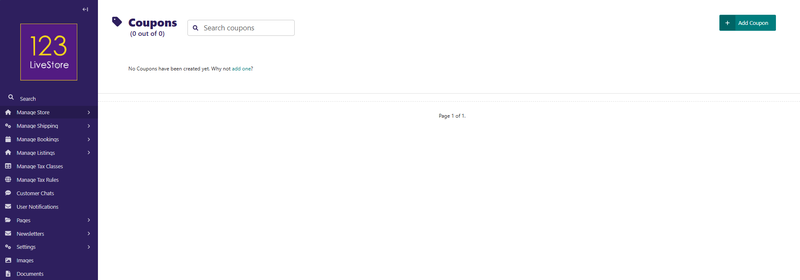
18. Manage Coupons
This menu option displays a list of Coupon Codes which you have created as the site admin. Click 'Add Coupon' to create a new coupon:
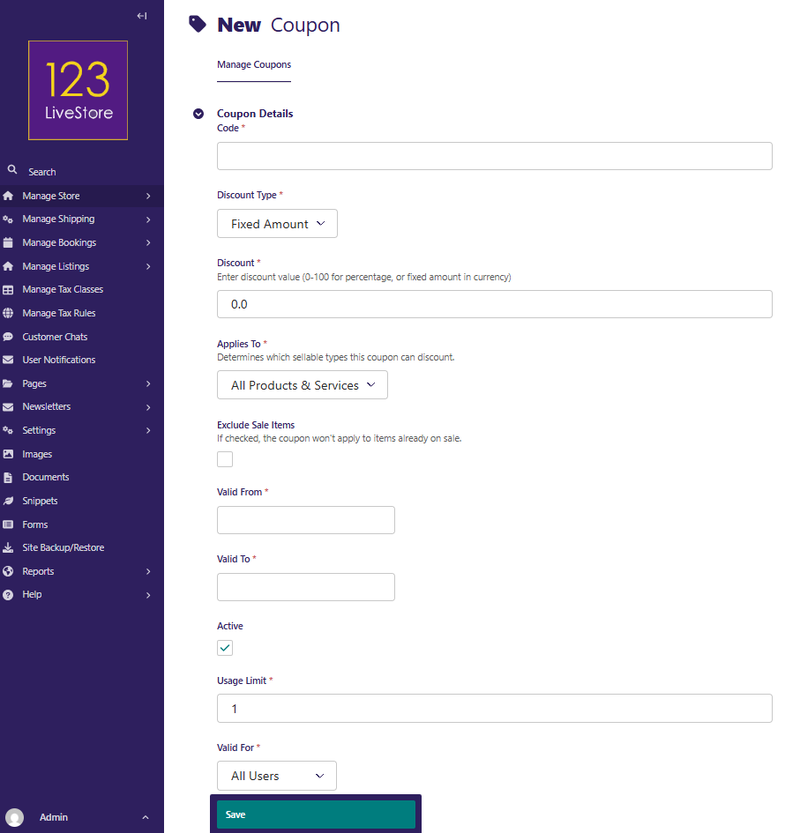
Code: Enter a suitable coupon code eg. VIP20
Discount Type: can be based on:
- Fixed Amount
- Percentage
Discount: Enter discount value (0-100 for percentage, or fixed amount in currency)
Applies To: Determines which sellable types this coupon can discount.
- All Products & Services
- Products Only
Exclude Sale Items - If checked, the coupon won't apply to items already on sale
Valid From and Valid To dates - determine a Coupon's validity period
Active - check to activate the coupon
Usage Limit - determines how many times the coupon can be utilized
Valid For - can be for ALL Users or Specific Users only
19. Store Report
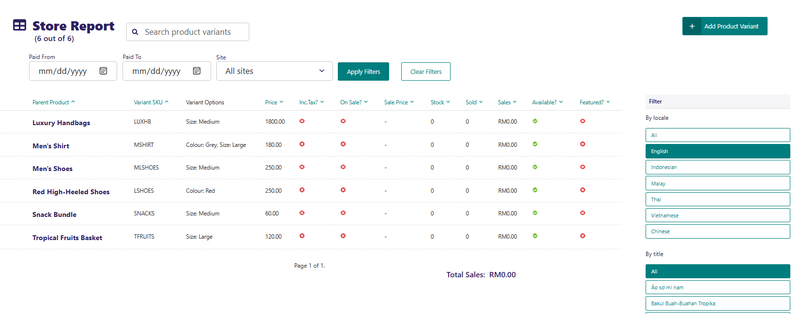
Store Report turns variant management into performance management.
- It helps identify top-performing variants quickly.
- It surfaces dead stock or low-conversion variants.
- It supports pricing and merchandising decisions with minimal friction.
- It keeps reporting close to operations in the same sidebar flow where staff already work.
Store Report also has functional filters that keeps reporting behaviour consistent:
- Paid date range filters
- Site filter (usually the default site)
- Filter-aware Sold, Sales, and Total Sales calculations
- Existing query params are preserved when applying these filters
- Variants still remain visible even when they have zero matching sales in the selected filter window
20. Best Practices
Set up attributes before products. Once you create a variant and assign options to it, changing the attribute structure later is cumbersome.
Use descriptive SKUs. A SKU like `TSHIRT-BLUE-L` is much easier to track than `SKU-A1B2C3D4`. SKUs must be unique across your entire store.
Mark one variant as Featured. The featured variant drives the price shown on browse pages. If none is featured, the system picks the cheapest available — which may not be what you want.
Always set a product as Available at the page level. The Product Available? toggle on the product page is the master switch for the entire product. Untick it to quickly pull a product from the browse page without deleting it.
Test your checkout before going live. Create a low-value test product, complete a purchase with your own account, and verify the order, confirmation email, and (for downloads) the download link all work correctly.
Keep shipping dimensions accurate for tangible products. Inaccurate dimensions lead to wrong shipping rates, which affect profitability.
Approve reviews promptly. Unapproved reviews are invisible to everyone except you. Customers who submit a review get no visible confirmation that it's been received — they may resubmit if you delay.
Use the "On Sale" flag, not a permanent price change. This way, you can remove the sale cleanly and always have an original reference price.
21. Troubleshooting
Product not showing on the browse page
| Possible Cause | Fix |
|---|---|
| Product page is unpublished | Publish the product page |
| Product Available? is unticked | Open the product page, tick the checkbox, save and publish |
| Store is disabled in WaaS Settings | Go to Settings → WaaS Settings → enable_store |
| Product is in a different locale | Make sure you are viewing the browse page in the correct language |
| Product was added under the wrong parent page | Move it under your browse page in the page tree |
Variants not showing / product shows "no variants"
| Possible Cause | Fix |
|---|---|
| No variants added | Open the product page and add at least one variant |
| All variants have Is Available? unticked | Tick Is Available? on at least one variant |
| Tangible variant: stock is 0 and track_inventory is on | Either restock, or untick Track Inventory if stock doesn't apply |
| Product page is in Draft | Publish the product page |
Wrong price shown on browse page card
The card uses the Featured Variant (available + featured). If no variant is featured, it falls back to the cheapest available variant. To fix: open the product, find the variant you want displayed, tick Featured Variant, save.
"Add to Cart" button not appearing or doing nothing
- Verify at least one variant is available and in stock
- Check that the cart app is included in your site's installed apps
- Check for browser console errors that may indicate a JavaScript issue
Sale price not showing
- Confirm On Sale? is ticked on the variant
- Confirm Sale Price is greater than 0
- Save and republish the product
Download link not appearing after purchase
| Possible Cause | Fix |
|---|---|
| No downloadable file uploaded to the variant | Upload a file under the variant's Downloadable Files section |
| Payment was not confirmed | Check the order status in Manage Orders; download entitlements are only created for completed orders |
| Customer is not logged in | Downloads require the customer to be logged in |
Subscription access is not working
| Symptom | Cause | Fix |
|---|---|---|
| Page accessible without subscription | No SubscriptionAccessRule for this page | Add a rule in Snippets → Subscription Access Rules |
| Customer says they bought but still gets redirected | Subscription product not marked `is_subscription=True` | Check the product's "Is Subscription" field |
| Lifetime subscriber being blocked | `end_date` was set instead of left null | Check UserSubscription records in site admin |
| Redirect goes to wrong product page | Wrong product selected in the SubscriptionAccessRule | Edit the rule and choose the correct subscription product |
Tax not appearing at checkout
- Confirm the product has a Tax Class assigned
- Confirm the tax class has at least one active Tax Rule (either a country-specific rule or a global fallback with a blank country)
- Confirm the Tax Rule's Is Active? is ticked
Product reviews not visible on the site
Reviews are hidden until approved. Go to Manage Store → Product Reviews and approve the review by ticking Approved and saving.
22. Frequently Asked Questions
Can I have a product with no variants?
No. The product page is just a container. The actual price, stock, and images live on variants. You must add at least one variant before customers can add the product to their cart.
Can I have a product with only one variant?
Yes. For a simple product with a single price, just add one variant. You do not need multiple variants unless you have options like size or color.
How many images can I add per variant?
There is no hard limit. However, only one image per variant can be marked as Featured Image.
Can the same image be used on multiple products?
Yes. Images are stored in the site's image library and can be selected for any variant.
Can I offer a free product?
Yes. Set the variant price to 0. The customer goes through checkout but pays nothing.
Will the store work if I have no payment gateway configured?
Yes, if you have enabled offline payment options. For online, PayPal or Stripe (or both) must be configured in your Settings → Payment Settings for checkout to work seamlessly.
Can customers buy a subscription without an account?
No. Subscriptions (and downloads) require a customer account so access can be tracked and verified per user.
What happens when a subscription expires?
The customer is no longer able to access subscription-gated pages. They are redirected to the upgrade page to renew. The `UserSubscription` record remains in the database with `is_active=False` after expiry.
Can I have multiple browse pages for different product categories?
Yes. You can create multiple `ProductIndexPage` pages in different parts of the page tree. Products must be children of their respective browse page — they can only appear on one browse page.
Can I search by SKU in the site admin?
Yes. The product search in the site admin supports partial SKU matching.
Internationalization
The store fully supports multiple languages.
- Product page content (title, description, attribute notes) can be translated
- Product attributes and option values can be translated in admin
- Reviews are shared across locales by SKU — a review written in English will appear on the French product page too
- Prices and variants are not locale-specific — they are the same across all translations of a product
- The browse page only shows products from the current locale — if a product has not been translated, it will not appear on a non-English browse page
To translate a product:
1. Open the product page in the site admin
2. Use Translate this page from the Localize menu
3. Submit it for translation or translate directly in the admin interface