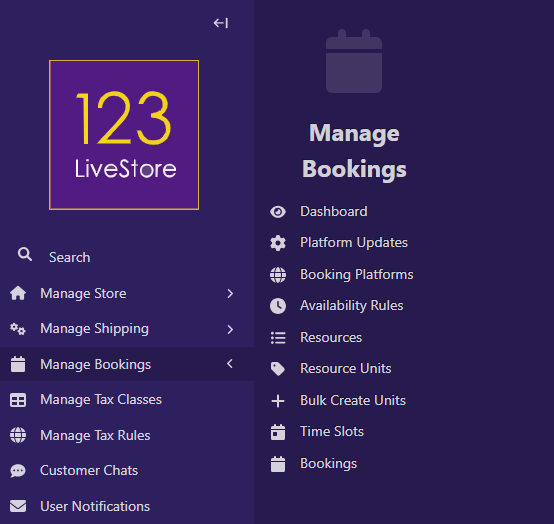
33 Manage Bookings
Your website supports bookings and appointments—a complete way to manage services, schedule customers, and handle check-ins/check-outs. Whether you're running a hotel, restaurant, tutoring service, rental business, or any business that needs online bookings, this feature has you covered.
Customers can browse your services, check real-time availability, book time slots or date ranges, and pay online. You manage everything from your admin dashboard.
How It Works: The Big Picture
Here's what happens when you set up bookings:
1. You define Resources (rooms, tables, tutors, vehicles, etc.)
2. You create Availability Rules (when services are available, how long appointments take, blackout dates)
3. You create Service Pages (what you're offering: "Deluxe Room", "Dinner Reservation", "1-Hour Tutoring Session")
4. Visitors browse services on your public booking page
5. Visitors select an available time slot or date range
6. Visitors complete the booking with their contact details and payment
7. You manage bookings from your admin dashboard:
- For hotels/restaurants: Assign rooms/tables, process check-ins/check-outs
- For online services: Send meeting links, track attendance
- For all: Export reports, manage OTA updates (Booking.com, Agoda.com, etc.)
Part 1: Enable the Bookings Feature
By default, bookings are turned off. You need to enable them first.
Step 1: Access WaaS Settings
1. Go to Site Admin (usually at `yourdomain.com/admin/`)
2. Click Settings in the left sidebar menu
3. Select WaaS Settings
4. Find the Booking Settings section
Step 2: Turn On Bookings
1. Check the box next to Enable Bookings (`enable_bookings`)
2. Set Booking Timezone: Choose the timezone for your property (e.g., "America/New_York", "Asia/Kuala_Lumpur")
3. Set Check-in Time: Default check-in time (e.g., 15:00 / 3 PM for hotels)
4. Set Check-out Time: Default check-out time (e.g., 11:00 / 11 AM for hotels)
5. Scroll to the bottom and click Save
That's it! Bookings are now enabled.
Note: You must create a Booking Landing Page (see Part 2) for bookings to appear publicly.
Part 2: Create Your Booking Landing Page
Customers discover bookable services on your Booking Landing Page. This is the main "browse" page showing all your services.
Step 1: Create the Landing Page
1. Go to Site Admin → Pages
2. Find the page where you want bookings to appear (usually under your home or website root)
3. Click Add child page
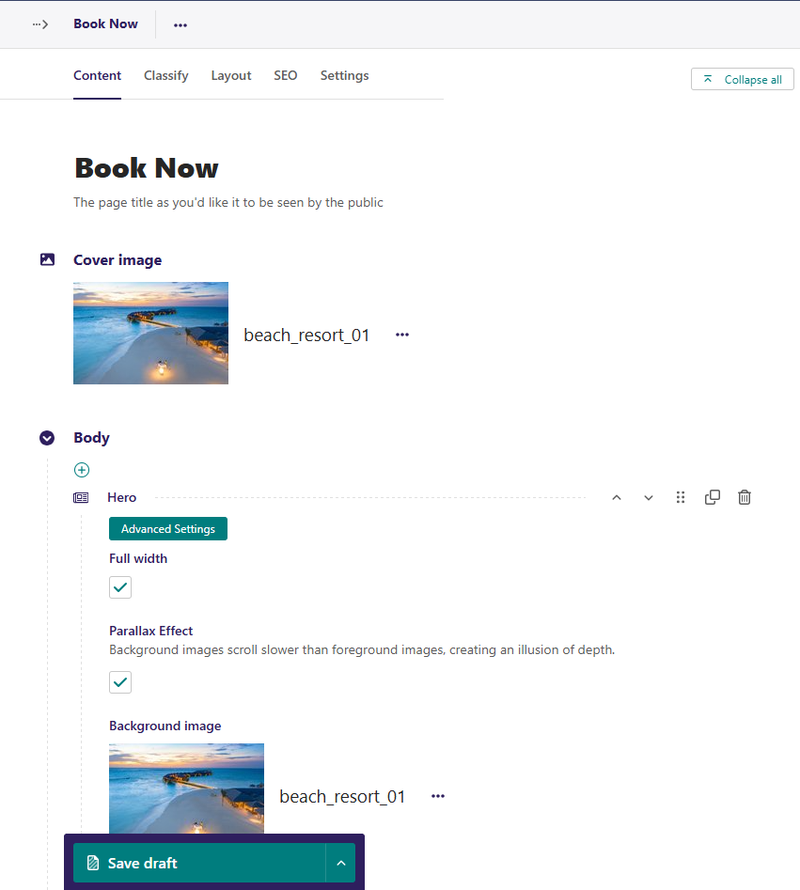
4. Select Booking Landing Page
5. Fill in:
- Page title: e.g., "Book Now", "Book Your Service", "Reserve Your Stay"
6. Optional: Add content to the Body field (welcome text, images, instructions)
7. SEO tab - Slug: e.g., `book-now` or `reservations` (becomes part of the URL)
8. Click Save draft and/or Publish
Step 2: Verify the Page Is Live
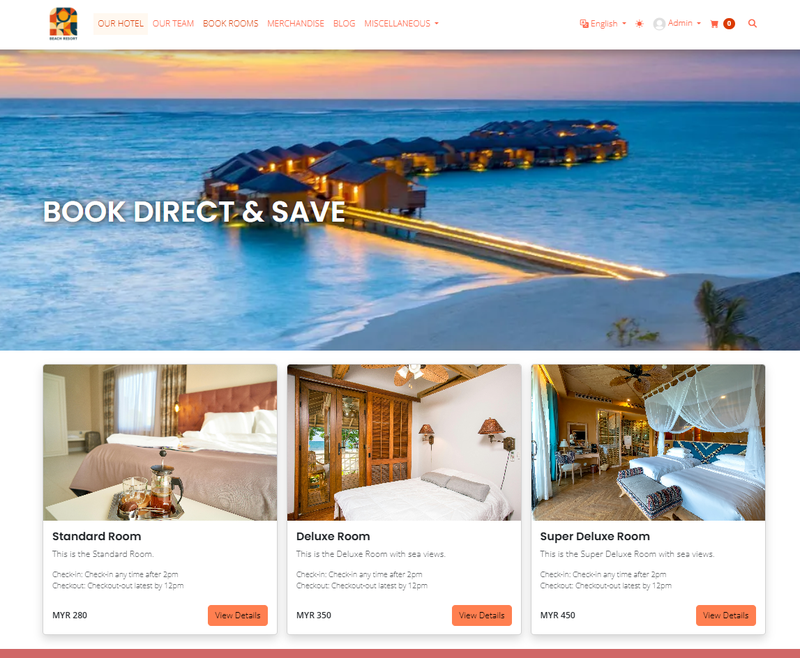
1. Visit your website
2. Navigate to the page (e.g., `/book-now/`)
3. Any services created will be listed. If you have not created any services, you will see a message "No services yet"
- This is normal! You'll add services next.
Part 3: Define Your Resources
A Resource is the thing being booked: a hotel room, restaurant table, tutor, rental vehicle, etc.
Step 1: Create Resources
1. Go to Site Admin → Manage Bookings → Resources
2. Click Add Resource
3. Fill in:
- Name: e.g., "Deluxe Room", "Patio Table", "Instructor", "Tesla Model 3"
- Resource Type: Choose from:
- Person: For tutors, consultants, personal trainers, etc.
- Room: For hotel rooms, conference rooms, studios
- Vehicle: For rental vehicles
- Other: For general resources
- Active: Check if this resource is currently available for booking
- Platform managed: Tick to enable OTA (Online Travel Agency) update suggestions for this resource. When checked, the system will generate suggestions to update your OTA listings (e.g., Booking.com, Agoda.com) whenever a booking is confirmed for this resource.
4. Click Create
Note: Capacity (how many simultaneous bookings are allowed) is set on each Service Page, not on the Resource itself.
Example Resources:
| Name | Type | Capacity | Use Case |
|---|---|---|---|
| Deluxe Ocean View | Room | 15 | Hotel with 15 deluxe room |
| Standard Room | Room | 35 | Hotel with 35 standard rooms |
| Patio Dining | Room | 8 | Restaurant with 8 outdoor tables |
| Senior Tutor | Person | 1 | Online tutoring service |
| Tesla Model 3 | Vehicle | 3 | Car rental company with 3 Teslas |
Step 2: Set Up Resource Units (For Hotels/Restaurants)
If you need to track individual units (e.g., "Room 101", "Table A5"), you can create them:
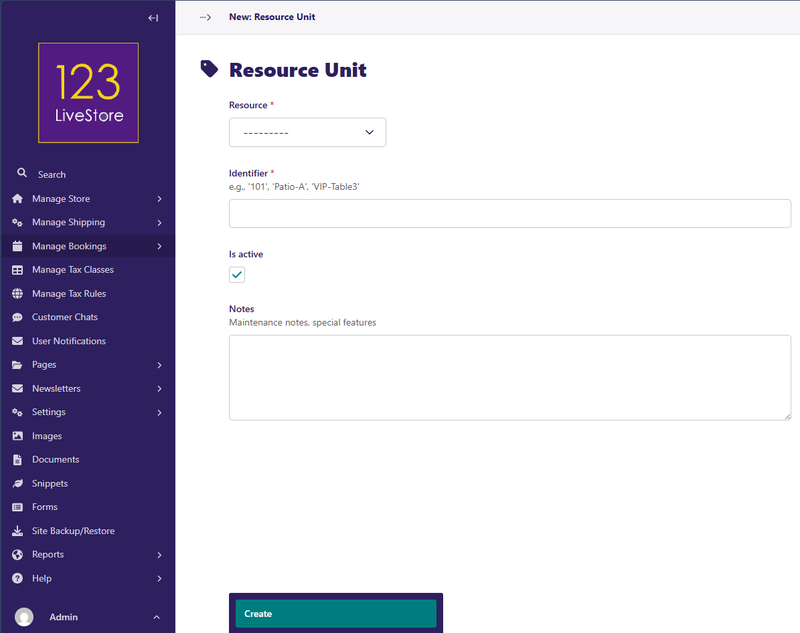
1. Go to Site Admin → Manage Bookings → Resource Units (single)
- Click Add Resource Unit
- Fill in:
- Resource: Select the parent resource (e.g., "Deluxe Room")
- Identifier: Unit label (e.g., "Room-101", "A5", "VIP-Table3")
- Is active: Check for bookable units
- Notes (optional): Maintenance notes or unit-specific details
4. Click Create
Repeat these steps for each unit you need.
For multiple units:
1. Go to Site Admin → Manage Bookings →Bulk Create Units
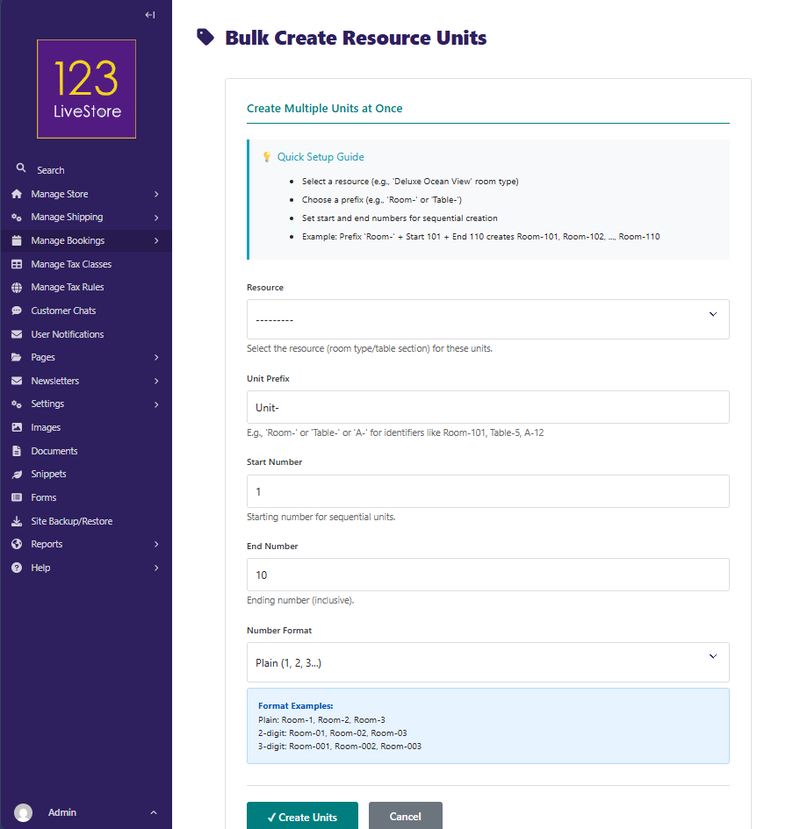
2. Fill in:
- Resource: Select the resource (e.g., "Deluxe Room")
- Unit Prefix: e.g., "Room-", "Table-", "Suite-"
- Start Number: e.g., 101 (for Room-101)
- End Number: e.g., 150 (for Room-150)
- Number Format: Choose Plain, 2-digit (01, 02), or 3-digit (001, 002)
3. Click Create Units
This creates: Room-101, Room-102, ..., Room-150
Part 4: Create Availability Rules
Availability Rules define when a resource is bookable: hours of operation, appointment length, blackout dates, etc.
Step 1: Create a Rule
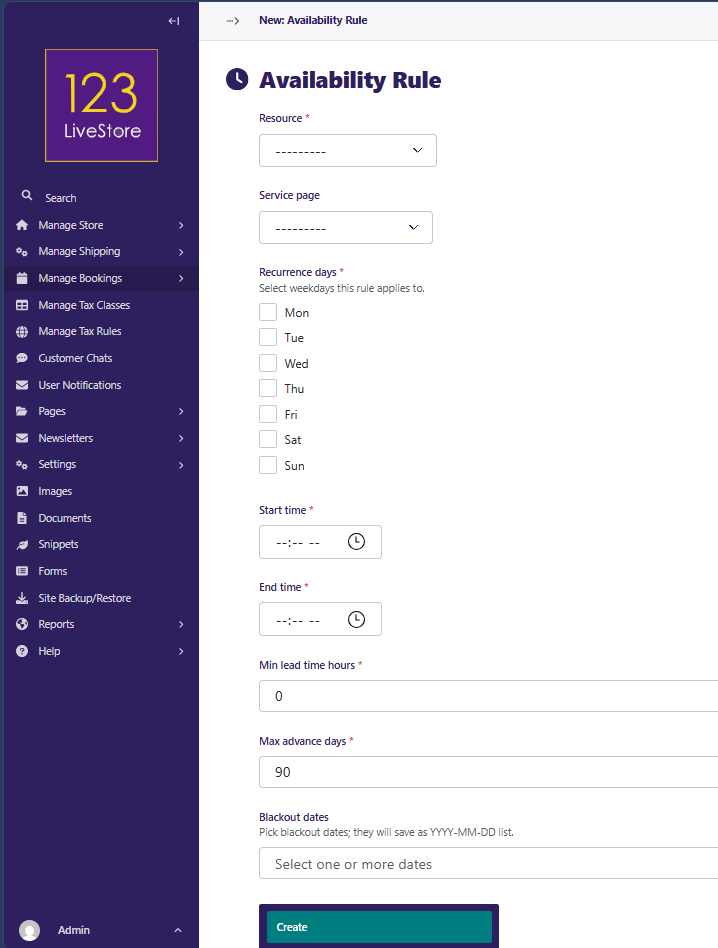
1. Go to Site Admin → Manage Bookings → Availability Rules
2. Click Add Availability Rule
3. Fill in:
- Resource: Select the resource this rule applies to (e.g., "Deluxe Room")
- Service Page: (optional, leave blank for now)
- Recurrence: Which days this rule applies to (e.g., check all days Mon-Sun, or only Tue-Thu for specific services)
- Start Time: When bookings can start (e.g., 15:00 / 3 PM for hotel check-in)
- End Time: When bookings end (e.g., 11:00 / 11 AM next day for checkout, or 21:00 / 9 PM for office hours)
- Min Lead Time (hours): Customers must book at least X hours in advance (e.g., 2 for appointments, 0 for immediate bookings)
- Max Advance Days: How far ahead customers can book (e.g., 90 days, 365 days)
- Blackout Dates: Dates when NO bookings are allowed (e.g., holidays, maintenance dates)
4. Click Create
Example Rules:
| Resource | Start | End | Duration | Lead Time | Max Days | Notes |
|---|---|---|---|---|---|---|
| Deluxe Room | 15:00 | 11:00 | 1440 min. | 0 hours | 365 days | Hotel stays (24 hours) |
| Senior Tutor | 09:00 | 17:00 | 60 min. | 2 hours | 90 days | 1-hour sessions, 2hr notice |
| Patio Table | 17:00 | 22:00 | 120 min. | 0 hours | 30 days | 2-hour dining slots |
Step 2: Time Slots Are Auto-Generated
Once you save a rule, the system automatically generates time slots for the next 30 days based on your rule.
- Hotel rule → generates daily 24-hour slots
- Tutoring rule → generates hourly slots (09:00-10:00, 10:00-11:00, etc.)
- Restaurant rule → generates 2-hour slots (17:00-19:00, 19:00-21:00, etc.)
Note: Time slots regenerate automatically as you approach the 30-day window. You don't need to do anything manually.
Part 5: Create Service Pages
A Service Page is what customers see and book: "Deluxe Room", "1-Hour Spanish Lesson", "Dinner Reservation", etc.
Step 1: Create Your First Service
1. Go to Site Admin → Pages
2. Click on your Booking Landing Page
3. Click Add child page
4. Select Service Page
5. Fill in basic details:
- Page title: e.g., "Deluxe Ocean View Room"
- Slug: e.g., `deluxe-ocean-view` (auto-generated, can customize)
6. Click Save draft (don't publish yet)
Step 2: Fill in Service Details
After saving, you'll see more fields. Complete them:
Pricing & Duration
- Base Price: Starting price (e.g., 250 for RM 250/night)
- Price Includes Tax: Check if the price already includes tax
- Tax Class: Select applicable tax class
- Currency: Select currency (defaults to your site setting)
- Duration (minutes): How long a booking is (e.g., 60 for 1-hour appointment, 1440 for full day)
Service Configuration
- Booking Mode: Choose from:
- Time slots (appointments): For tutoring, consultations, haircuts—customers pick a specific time slot
- Date range (stays/rentals): For hotels, vacation rentals—customers pick check-in and check-out dates
- Capacity: How many people can book this service at once (e.g., 1 for tutor, 4 for room with 4 guests)
- Is Online: Check if this is a remote/online booking (e.g., Zoom tutoring)
- Is Group Booking: Check if groups can book together
- Currency: Select currency for this service
Check-in/Check-out (For Hotels/Restaurants)
- Check-in Notes: e.g., "Check-in from 3 PM to 11 PM at the front desk"
- Check-out Notes: e.g., "Please check out by 11 AM"
Description & Media
- Summary: Short intro (1-2 sentences) for the browse page
- Example: "Luxurious ocean-view suite with king bed, private balcony, and modern amenities"
- Body: Full description using rich text (images, formatting, etc.)
- Gallery Images: Add multiple images (customers see image gallery on detail page)
Step 3: Assign This Service to a Resource
The system automatically links services to resources based on the availability rules.
To manually verify/adjust:
1. Create an Availability Rule for this service (Part 4)
2. The rule links the service to a resource and an availability schedule
Step 4: Publish the Service
Click Publish
The service now appears on your Booking Landing Page!
Part 6: Manage Bookings (Admin Dashboard)
Once customers start booking, you manage them from your admin dashboard.
Step 1: View All Bookings
1. Go to Site Admin → Manage Bookings → Bookings
2. You'll see:
- Customer name and contact info
- Service booked
- Date/time of booking
- Status (Pending Payment, Confirmed, Checked In, Completed, Cancelled)
- Total amount
Step 2: Booking Status Flow
| Status | Meaning | What's Next |
|---|---|---|
| Pending Payment | Customer completed form but hasn't paid | Wait for payment or send reminder |
| Confirmed | Payment received, booking is locked | Prepare for arrival/appointment |
| Checked In | Customer has arrived/service started | Track occupancy or attendance |
| Completed | Service finished, customer left | Archive booking, ask for review |
| Cancelled | Booking cancelled by customer or you | Check if slots were freed up |
Step 3: Update Booking Status
1. Click on a booking to open it
2. Change the Status field
3. Click Save
Step 4: Search & Filter Bookings
Use the search and filter options:
- By customer name/email/phone
- By service
- By resource
- By status
- By date range
This helps you quickly find bookings to manage.
Part 7: Hotel/Restaurant Operations (Check-in/Check-out)
If you're running a hotel or restaurant, you need to handle check-ins and check-outs.
Step 1: Access the Operational Dashboard
1. Go to Site Admin → Manage Bookings → Dashboard
2. You'll see a real-time view with:
- Pending Check-ins: Guests arriving today
- Currently Checked In: Guests in rooms/at tables now
- Pending Check-outs: Guests leaving today
- Room/Table Availability Grid: Visual status of all units
Step 2: Check In a Guest
Before the guest arrives:
1. Create the booking (customer fills out the online form or you enter it)
2. Mark Status as "Confirmed"
When the guest arrives:
1. Go to Dashboard → Pending Check-ins
2. Find the guest
3. Click the Unit Dropdown and select a specific room/table (e.g., "Room-205")
4. Click the Check In button
5. System records check-in timestamp and moves guest to "Currently Checked In"
Step 3: Check Out a Guest
1. Go to Dashboard → Pending Check-outs
2. Find the guest
3. Click the Check Out button
4. System records check-out timestamp, marks booking as "Completed", and frees the unit
Step 4: Export Reports
From the dashboard, you can export:
- Pending Check-ins: Today's arrivals
- Checked In: Current occupancy
- Daily Report: Today's activity summary
CSV exports include guest info, room/table, timestamps, and status—useful for records and accounting.
Part 8: Online Services (Tutoring, Consultations, etc.)
If you offer online services, here's how to use bookings:
Step 1: Create Service Page
1. Create a Service Page (Part 5)
2. Set Is Online = Checked ✓
3. Set Booking Mode = "Time slots" (for appointments)
4. Fill in pricing and duration
5. Publish
Step 2: Create Availability Rule
1. Go to Manage Bookings → Availability Rules
2. Create a rule for your resource (e.g., "Senior Tutor")
3. Set office hours (e.g., 09:00-17:00)
4. Set appointment length (e.g., 60 minutes)
5. Publish
Step 3: Add Meeting Links
After a customer books, you can add their Zoom/Teams/Google Meet link:
1. Go to Manage Bookings → Bookings
2. Find the confirmed booking
3. Scroll to the Meeting Link field
4. Paste the Zoom/Teams/Meet URL
5. Click Save
The link is automatically included in the confirmation email sent to the customer.
Step 4: Track Attendance
- Booking Status changes as the appointment progresses:
- Confirmed: Waiting for appointment time
- Checked In: Appointment is happening (manual mark when they join)
- Completed: Appointment finished
- Cancelled: No-show or cancelled
Part 9: OTA Integration (Booking.com, Airbnb, Agoda, etc.)
If you use OTA (Online Travel Agency) platforms, you can get AI-powered update suggestions.
Step 1: Enable OTA Suggestions
1. Go to Manage Bookings → Resources
2. Edit the resource (e.g., "Deluxe Room")
3. Check Platform Managed ✓
4. Click Save
Now, when bookings are confirmed, the system generates update suggestions.
Step 2: Review OTA Suggestions
1. Go to Manage Bookings → OTA Update Suggestions
2. You'll see pending suggestions showing:
- Which resource availability changed
- Previous capacity vs. new capacity
- What action to take (e.g., "Update Booking.com inventory to 5 units for Apr 25")
3. Review the suggestion
4. Click Approve to mark it as ready (you still update manually on the OTA platform)
5. Or Reject if the suggestion is wrong
Step 3: Update Your OTA Platform
After approving a suggestion, manually update the OTA:
1. Log into your OTA account (e.g., Booking.com manager)
2. Navigate to inventory/pricing
3. Update availability per the suggestion
4. Save
Important: The system does NOT connect directly to OTA platforms (no credentials stored). You review suggestions and update manually. This keeps your account safe and gives you control over pricing/availability.
Part 10: Best Practices
For Maximum Bookings
- ✅ Set reasonable lead times: 0-2 hours for immediate services, 24 hours for restaurants
- ✅ Set advance booking window: 30-365 days depending on your business
- ✅ Use accurate pricing and ensure prices include any taxes
- ✅ Create high-quality service descriptions with good images
- ✅ Keep availability rules up-to-date (adjust for seasonal changes)
- ✅ Test bookings from a customer's perspective before going live
- ✅ Publish Booking Landing Page in your main navigation
For Hotels/Restaurants
- ✅ Pre-assign units for VIP guests or repeat customers
- ✅ Check dashboards regularly (daily minimum for busy seasons)
- ✅ Export daily reports for accounting and records
- ✅ Mark units inactive during maintenance
- ✅ Set check-in/check-out times in WaaS Settings
- ✅ Train staff on check-in/check-out workflow
- ✅ Use the bulk creation tool to set up all rooms/tables at once
For Online Services
- ✅ Add meeting links to bookings well before the appointment
- ✅ Send confirmation reminders (consider email automation)
- ✅ Mark no-shows by cancelling or noting in booking metadata
- ✅ Consider group booking if multiple clients can join one session
- ✅ Set timezone clearly in availability rules
For Multi-Resource Businesses
- ✅ Use Classifiers/Categories to help customers find specific resources
- ✅ Create resource-specific services (not one generic service)
- ✅ Set different availability rules per resource (some may have different hours)
- ✅ Monitor occupancy rates to identify peak times
For Payment & Revenue
- ✅ Set currency correctly for your market
- ✅ Enable tax calculation if applicable (via Tax Class)
- ✅ Consider deposit options (e.g., pay 50% now, 50% at check-in)
- ✅ Use price tiers if you have different service levels
- ✅ Review payment success rates in order reports
Part 11: Troubleshooting
"Bookings feature is disabled" error
Problem: You see a 404 error when trying to access bookings.
Solution:
1. Go to Site Admin → Settings → WaaS Settings
2. Check Enable Bookings ✓
3. Fill in Booking Timezone
4. Click Save
"No services showing on Booking Landing Page"
Problem: You've created services but they don't appear on the browse page.
Solution:
1. Verify each Service Page is Published (not Draft)
2. Verify each service has a Base Price set
3. Verify each service is a child of your Booking Landing Page
4. Verify at least one Availability Rule exists for that service's resource
5. Clear browser cache and reload
"Time slots aren't generating"
Problem: You created an Availability Rule but customers see "No availability".
Solution:
1. Go to Manage Bookings → Availability Rules
2. Verify the rule has:
- A Resource selected
- Start Time and End Time set
- Recurrence days checked (Mon-Sun)
3. Wait 1-2 minutes for slots to generate
4. Go to Manage Bookings → Time Slots and verify slots exist
5. Check that Max Advance Days is set to at least 1-2 days
"Booking button doesn't work or shows an error"
Problem: Customers click "Book Now" but get an error or nothing happens.
Solution:
1. Verify Bookings are enabled in WaaS Settings
2. Verify at least one Resource with Capacity > 0 exists
3. Verify at least one Service Page is published
4. Verify at least one Availability Rule is created
5. Verify Time Slots have been generated (check admin)
6. Try in an incognito/private browser window
7. Check browser console (F12) for JavaScript errors
"Customers can't select payment"
Problem: Booking form doesn't show payment options or payment fails.
Solution:
1. Verify your Store is enabled in WaaS Settings
2. Verify a Payment Gateway is configured (Stripe, PayPal, etc.)
3. Verify the service has a Base Price set
4. Verify the payment processor is active and has valid API keys
5. Test with a payment provider's test credit card
"Check-in button is disabled/greyed out"
Problem: On the dashboard, the Check-In button doesn't work.
Cause: Booking status is not "Confirmed" yet.
Solution:
1. Go to the booking record
2. Verify Status is "Confirmed" (not "Pending Payment")
3. If pending payment, collect payment to move to Confirmed
4. Then try check-in again
"Units don't show in dropdown"
Problem: When checking in, the unit selection dropdown is empty.
Solution:
1. Go to Manage Bookings → Resource Units
2. Verify units are created for this resource
3. Verify units have Active checked ✓
4. Try refreshing the page
5. If no units exist, use Bulk Create Units to create them
"Availability isn't updating after a booking"
Problem: Customer booked a slot but availability still shows it as available.
Solution:
1. Wait 2-3 seconds for page to refresh
2. Refresh your browser (Ctrl+R)
3. Go to Manage Bookings → Time Slots and check status
4. If slot status is wrong, contact a developer
"OTA suggestions aren't appearing"
Problem: You approved "Platform Managed" but no suggestions show up.
Solution:
1. Verify the resource has Platform Managed checked ✓
2. Verify bookings are being created and Confirmed
3. Wait a few seconds after a booking is confirmed
4. Check OTA Update Suggestions page again
5. Verify at least one OTA Platform is configured (Booking.com, Airbnb, etc.)
"Meeting link isn't sent to customer"
Problem: Customer doesn't receive the Zoom/Teams link in confirmation email.
Solution:
1. Verify you've added the Meeting Link to the booking
2. Verify the Service Page has Is Online checked ✓
3. Verify your site's email sending is configured (check SpecialConfig)
4. Resend the confirmation manually or ask customer to check spam folder
5. Contact a developer if emails aren't sending
"Timezone is wrong in availability/check-in times"
Problem: Time slots show in the wrong timezone or check-in times are off.
Solution:
1. Go to Site Admin → Settings → WaaS Settings
2. Verify Booking Timezone is set to YOUR timezone (e.g., "America/New_York")
3. Click Save
4. Go to Manage Bookings → Availability Rules
5. Verify each rule's Timezone matches (should auto-fill)
6. Wait for time slots to regenerate (2-3 minutes)
"Customer information is missing or wrong"
Problem: Booking shows no customer name/email or shows wrong info.
Solution:
1. Edit the booking
2. Scroll to Customer Information section
3. Fill in or correct:
- Customer Name
- Customer Email
- Customer Phone
4. Click Save
Part 12: Frequently Asked Questions (FAQ)
Q: Can customers book the same resource multiple times?
A: Yes. Each booking is independent. One person can book Room 101 for tonight and again for next week.
Q: What if a customer wants to book for multiple days?
A: Use Date Range booking mode when creating the service. Customers select check-in and check-out dates.
Q: Can I offer discounts for group bookings?
A: Not built-in yet, but you can:
1. Create a separate service with a lower price
2. Ask the customer to contact you for a custom quote
Q: How do I handle walk-in customers?
A: Manually create a booking in the admin:
1. Go to Manage Bookings → Bookings
2. Click Add Booking
3. Fill in customer info (or leave name/email blank for anonymous walk-in)
4. Select service, resource, date/time
5. Set Status to "Confirmed" (skip payment)
6. Click Save
Q: Can I cancel or modify a customer booking?
A: Yes:
1. Go to Manage Bookings → Bookings
2. Click on the booking
3. To cancel: Change Status to "Cancelled"
4. To modify: Update Start, End, Resource, etc., and click Save
Q: What if I need to block dates (maintenance, vacation, etc.)?
A: Add blackout dates to Availability Rules:
1. Edit the rule
2. Scroll to Blackout Dates
3. Click Add date and select dates to block
4. Click Save
Customers won't see slots for those dates.
Q: How do I set different prices for peak vs. off-season?
A: Currently, all bookings use the service's base price. For advanced pricing:
- Create separate services: "Room (Standard Season)", "Room (Peak Season)"
- Or contact a developer for dynamic pricing
Q: Can I send automated reminder emails to customers?
A: The system sends confirmation emails automatically. For reminders:
- Consider using a third-party email automation tool
Q: How do I export bookings for accounting?
A:
1. Go to Manage Bookings → Dashboard (for hotels/restaurants)
2. Click Export Daily Report or Export Checked In
3. Or go to Manage Bookings → Bookings and use browser's export features
Q: What's the difference between "Resource" and "Resource Unit"?
A:
- Resource = type (e.g., "Deluxe Room")
- Resource Unit = specific instance (e.g., "Room-101", "Room-102")
For small businesses with 1-2 units, you don't need Resource Units. For hotels/restaurants with many rooms/tables, use Resource Units for check-in tracking.
Part 13: Advanced Features
Booking Metadata & Custom Fields
Bookings can store custom data in the Metadata JSON field for future extensibility.
Integration with Orders & Payments
Bookings can be tied to Order Items for payment processing and revenue tracking:
- Customers pay during booking
- Payment creates an Order
- Booking links to the Order for accounting